Tag : precision manufacturing

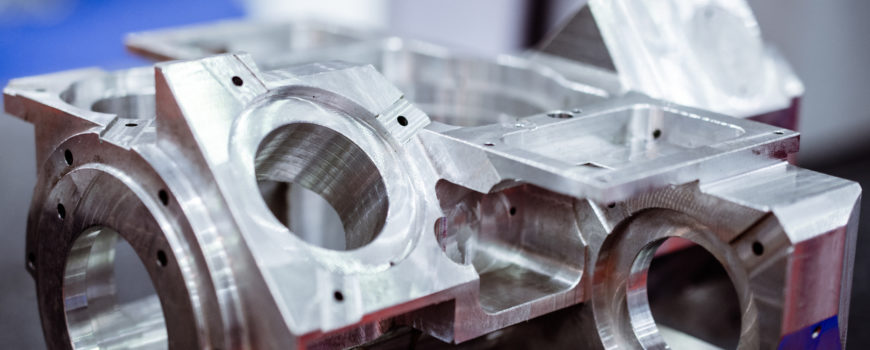
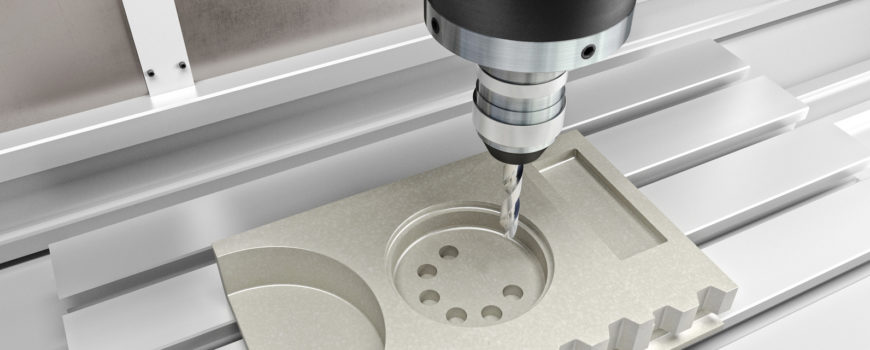
Detail of aluminum machined parts, shiny surface.

Achieving Maximum Efficiency in Machining Tight Tolerance Parts

The best practices for precision manufacturing come from using computer numerical controlled (CNC) machining. CNC manufacturing uses high-speed, robot-driven machines and specialized cutting equipment in a custom machine shop. A machine shop for CNC manufacturing will have vertical and horizontal milling machines and lathes.

This CNC process can make custom machined parts to meet the exact specifications of the original equipment manufacturer (OEM) parts. Besides precision manufacturing, a CNC machinist can perform prototype machining in preparation for full-run CNC manufacturing.

This is a guide to the best practices with practical tips on how to create designs, use prototype machining, and choose materials that result in the most cost-efficient custom machined parts produced by CNC machining.

It Starts With Superb Design

Before the machine shop work can begin, creating a precise computer-aided design (CAD) model is the first step. Then, the CAD model is loaded into computer-aided manufacturing (CAM) software. This creates the instructions that tell the robotic machines how to move in order to cut away material from a manufacturing blank in order to form the desired end result.

The instructions are very detailed and include the following:

· The tool paths that are necessary, based on the geometry of the finished part.

· How fast the cutting machine should move.

· How fast and in what direction to turn the materials stock and/or the cutting tool.

· The precise locations and how to move, based on a three- or five-axis coordinate system.

The computer controls of the machine doing the cutting work guide the movements on all three X, Y, and Z axis simultaneously, making complex cuts and detailed geometric patterns possible.

Choosing the Right Cutting Tool for the Design

A CNC lathe has a fixed cutting tool and the material stock rotates. A CNC mill is the opposite, With a mill, the tool rotates and the material stock is stationary. Using a CNC lathe produces a better result for complex cylindrical shapes.

If a part requires square features, these are better made using a CNC mill. If a round part has a square feature, then first the round geometry is produced on a CNC lathe and then the square features are cut with a CNC mill.

Part sizes are limited to the tool clearance of milling machines and the depth of the cuts possible. Lathe part size capability depends on the build space. A live tooling lathe combines CNC milling capability within the lathe, which is a beneficial tooling solution to increase the features that can be produced and reduce lead times.

Default Tolerances

Unless a customer provides specifications that include tolerances, the general permissible tolerance levels are plus or minus 0.005 inches for metal parts and plus or minus 0.010 inches for plastic parts. The walls of metal parts are a minimum of 0.030 inches thick. The walls of plastic parts are a minimum of 0.060 inches thick.

The best practice is to mill the finish to a maximum 125 micro-inches as measured by the root-mean-square (RMS) of the peaks and the valleys of the surface. Surface finish treatment is only applied if requested.

Tighter Tolerances

Very tight tolerances are possible that exceed the standard default tolerances. However, tighter tolerances result in added expense because a tighter tolerance may increase waste, require more fixturing, and/or additional measurement processes. Longer cycle times may be necessary to slow down the machining in order to achieve tighter tolerances. Therefore, tighter tolerances should only be specified when necessary to achieve critical design specifications.

Material Choices and Blank Size

Raw material selection is determined based on the part’s design, functionality, and cost limitations. There is usually a need for certain material characteristics such as chemical resistance, rigidity, thermal stability, heat treat-ability, hardness, and others.

The type of raw material used strongly influences the cost of the part. Plastics are preferred and are much less expensive. Plastics are a wise choice if the rigidity of metal is not needed. Metals that are softer, such as brass and aluminum, are easier to machine than stainless steel and carbon steel.

As a general rule, add 0.125 inches to the material size in all three directions of width, length, and depth. This is the necessary size of the material blank to be used for cutting. It is more cost effective to used standard material blanks if possible. For example, if a part can have the dimensions of 0.875 inches or less on each side, then a standard one-inch cube as the material blank can be used.

Part Complexity — Three-Axis vs. Five-Axis Machining

Two-axis cuts are the easiest and least costly. For a more contoured part, three-axis cutting is necessary with the cuts being made by the tool or blank moving simultaneously on the X., Y, and Z axis.

With five-axis machining more complex parts can be made in a cost-efficient way. In five-axis cutting, the tool and the blank move simultaneously around in five ways. Five-axis machining reduces the number of setups needed, achieves faster cutting speeds, uses better tool paths, and results in a better surface finish.

Fillets

A CNC milling machine (horizontal or vertical) makes interior vertical walls with a radius. It is a round tool, which spins at a high revolution per minute (RPM) that removes the blank material. This limits designs to allow for where radii occur.

Inside corner fillets are easier to make by using a radius that is non-standard. End mills need clearance to turn and to continue milling. By adding 0.02 inches to an internal radius, the cutter can turn slightly without having to stop. This reduces cost and results in better CNC parts. In general, the larger the radius the lower the cost.

Floor fillets are easier to machine if the floor radius is less than the corner radius. If the floor and wall radius is the same size, then it makes it challenging to remove the corner material. If the floor radius is somewhat smaller than the wall radius, then the same tool can be used to create a nice flow through the corner.

Undercuts

If a standard machining tool cannot reach an area, this creates an undercut region on a part. It is better to avoid the need for a special tool that would be required if the feature is not a standard dimension because a custom tool is expensive. A standard tool is less than half the cost of a custom tool. It is also important to make sure the undercut can be reached and is not too deep. A less shallow undercut is better.

Threads

To reduce costs, use standard thread sizes and the largest thread size possible. Small taps have a greater chance of breaking during production than larger ones do. Only specify the depth of the tap necessary because deep, threaded holes increase the cost of the part. A custom tool may be needed for very deep holes.

Surface Finishes

The standard milled finish is 125 RMS. With this finish, minor tools marks may be visible. Smoother finishes of 63 RMS, 32 RMS, or 16 RMS are possible, but they increase the processing time necessary to make the part.

A bead-blast finish creates a matte surface by blowing tiny glass beads under pressure at the surface. If the masking of some areas from the bead blasting is necessary, this adds to the expense.

A corrosion-resistant finish can be created by anodizing a metal part. This can be done with a transparent finish or in different colors (red, black, gold, etc.). This is a popular finish for aluminum parts. Hard-anodizing is also available that creates a thicker, wear-resistant surface layer.

A powder-coat paint finish is created by spraying on paint and then baking the painted part in an oven. This creates a very strong finish that is wear- and corrosion-resistant. It is more durable than regular paint. Many colors are available to create a nicely-finished look for a part.

Custom finishes are also available, at additional expense, such as plating or specialized chemical films.

Summary

By following these best practices as a guide, it is possible to get excellent results when working with Tag Team Manufacturing. This is a machine shop Denver has that can produce up to 50,000 components annually for Denver manufacturing and other locations. Contact Tag Team Manufacturing for a quote from the best Denver CNC machine shop.

Energy efficiency as car speedometer. 3d illustration

Energy Efficiency – The Key to Success in Manufacturing

In today’s world there is a great deal of focus on sustainability and energy efficiency.  It seems everything, from cars to buildings, is measured by its carbon footprint, or environmental impact.  Other countries, such as the United Kingdom, have strict energy regulations in place for manufacturing industries and for machine shops.  The United States currently does not have any formal regulations regarding energy usage, but that should not stop the CNC machinist from doing everything in his or her power to limit energy consumption in their machine shop.

Limiting the amount of energy used within the machine shop has several benefits.  Of course, limited energy expenditure is more environmentally friendly, reducing the amount of electricity pulled from the power grid.  Reducing energy also has a trickle down benefit to the machine shop owner, OEMs, clients, and customers alike.  Less energy usage can reduce the amount of money spent on electricity, replacement parts and tools, and waste material.  Saving money in the manufacturing process is the key to success by allowing the shop to create an environmentally conscious product for less money.

Mindful Process Changes

One way a CNC machine shop is able to become more energy efficient is by making mindful and impactful process changes.  There has been a great deal of research conducted regarding the amount of energy consumed within the manufacturing process.  By making strategic and thoughtful decisions related to the process of creating components, it is possible to create a more energy efficient process.

Cycle Time

Selecting tools that can both increase a faster feed rate, while reducing feed time, is an excellent way to impact the cycle time between completed components.  In one study, simply selecting the right tool for the job made all the difference.  Consider the advantage to using multi-fluted tools.  This is a great way to deliver instant energy savings over the course of the manufacturing process.  The higher amount of flutes allows for a shorter cycle time, creating more parts per minute.

There is some trade off though, so the CNC machinist must be strategic in their selection.  More flutes, and thus more components, is not always better.  In some cases, while more flutes can certainly increase production, wear on the component can become a challenge.  Multi-fluted tools, or specialty tools, can be expensive to replace.  Further, more fluting can often result in irregular wear patterns which means the tool has an overall shorter lifespan.  Understanding the broader reaching purpose for the job, and selecting the right tool, will ultimately find a happy medium.  The key to cycle time energy efficiency is being able to balance the cycle time increases with the life expectancy of the tool.

Coolant Process

Another area machine shops are able to find energy saving changes is within the coolant process.  Often, coolant delivered to the tools via through-tool delivery help to prolong the life of the tool.  This method can increase how long a tool can be used, thus saving money and resources on replacement parts.  Further, using through-tool coolant can make the wear on the various tool components more uniform.  If the wear is uniform, it helps the CNC machinist predict the wear pattern, thus increasing the usability of the tool.

Further, there are methods to use coolant recycling systems.  These systems can easily be connected to the machine plant cell.  They work by combining a combination of recycled coolant with new coolant.  Studies have shown that by mixing recycled and new coolant there are no noticeable differences in performance.  Not only does this recycling method help to reduce coolant costs, but it has also shown to cut water usage by upwards of 10%.

Software Programming

Using various available software programs to better aid in the manufacturing process, particularly for custom machined parts,  helps to save energy.  Specialized programing is available to help create a custom tool path.  This allows the user to maintain uniform stress on the tool, keeping constant and even pressure, to create a curving, circular path.   Using this continuous, smooth motion allows the machinist to create the component with faster cutting speeds, without risk of tool damage with sudden, sharp turns, thus reducing energy costs.

Another software element indispensable in precision manufacturing is specialized programming that allows the tool to cut with uniform force.  Having a steady cutting force results in energy reduction without varying forces and additional electric input to adjust for changing pressures.

Machine Tool Selections

Aside from making logical and strategic processing decisions, the tools within the machine shop itself can be energy efficient.  There are several tools designed for energy efficiency, especially with the eco-friendly mindset of several companies and customers alike.

Limit Base Load

There are many energy-sapping functions within a tool that can go unnoticed, aside from the immediate energy load required to operate the tool during active phases.  Many auxiliary parts continue to run, even while the tool is in between phases.  The tool’s base load still consumes energy even while the tool is resting.  Luckily, there are many new tools that can be switched off during these non-productive phases which can help save on energy costs.

Tool Selection

Addressed earlier while mentioning the practice of selecting the right tool to increase cycle times, tool selection can also impact the amount of energy consumed.  Of the many components, a spindle can greatly impact the tool’s efficiency.  If the spindle drive is run too slowly, below it’s intended operating speed, it can eat up a tremendous amount of unnecessary energy.  Further, throttling the tool to reduce the speed only increases the time it takes to manufacture a component.  Increased manufacture time leads to an increased use of electricity.  It is recommended that spindle motor efficiency is considered for the component in question.  Sometimes energy efficiency can be improved by using synchronous motors as opposed to asynchronous motors.

Regenerative Supply Usage

Lastly, tools are now made in precision manufacturing that have a regenerative energy supply.  Traditionally, fast moving tools require an internal braking system to slow down the acceleration.  In a non-regenerative system the power used to brake the tool is converted to heat, from friction, which is then lost in the overall process.  Regenerative tools are now available that redirect that lost energy into useable kinetic energy, sent right back to the power grid.

This regenerative supply can help save energy in several ways.  Not only can regenerative power help maintain consistent power to the tool, foregoing the momentary power loss sometimes exhibited when the tool starts and stops, but it can also help in processes that require multiple tool changes.  In systems that require one, or multiple tool changes within 100 seconds regenerative power supplies are able to keep constant energy to the system.  In a non-regenerative tool, the power it takes to restart the machine after a tool change spikes, drawing an excess amount of power from the grid.  This can be avoided with a regenerative tooling system.

Just because the United States has not fully regulated energy consumption by machine shops nationwide, does not mean manufacturers are not interested in the valuable savings associated with energy efficiency.  Conserving energy is a key factor for an original equipment manufacturer in the Denver manufacturing market.  Between prolonging the life expectancy of tools, saving money on energy costs, and making environmentally friendly choices it is clear that energy efficiency is the path for a successful manufacturing process.

Check out another article on renewable energy in Manufacturing.

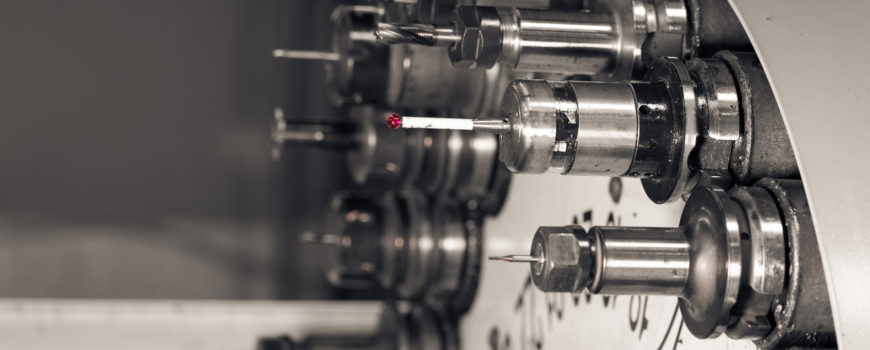
CNC machine at work

Challenges Manufacturers will face and how to overcome them in 2019

Manufacturers are constantly faced with a variety of challenges and staying competitive and profitable requires the ability to identify issues and enact effective resolutions that can adequately provide a remedy. One of the biggest challenges manufacturers will face in 2019 is creating new markets for custom manufacturing. Perhaps a company can identify a need for a particular product for an emerging market, but creating the avenue to successfully engage that need and fulfill the gap poses a definite challenge.

Identifying Emerging Market Potential

The ability to identify an emerging market and firmly secure a place for custom and precision manufacturing companies within that market is one of the keys to promoting growth and remaining competitive in an ever-changing business landscape. Each year, there are new products and services being developed in mass for the consumer marketplace. If a manufacturer can get a lead on identifying the next big market in which they can provide custom or precision manufacturing, they will have an advantage over the other competitors.

The most effective way to identify these new emerging markets is through research. Part of that research may also involve engagement with a variety of potential consumers across several demographics to establish viability. Having highly trained and insightful staff who can accurately gauge the interest in a particular emerging market and focusing in on specific details that involve providing necessary manufacturing processes will allow companies to partner with new and exciting businesses.

Show How Custom Manufacturing Can Replace Traditional Methods

An effective way to secure the confidence of new clients in emerging markets is to show them how manufacturers can improve on a product and make it more appealing and of a higher quality. Replacing traditional manufacturing that can’t offer the same benefits will allow those products to be more well rounded and versatile. Adding better, high quality 1 features and making more versatile products will benefit all parties. Here are some key points to address and focus in on when presenting an argument for selecting customer or precision manufacturing for new emerging markets.

  •  Value

One of the most important topics related to manufacturing is value. Manufacturers should focus on proving their clients with value they can’t find elsewhere. The argument for value can be presented by highlighting the benefits of using specially created custom parts that add to the function, durability, and quality of a consumer good.

  • Originality

The best way for a product to stand out from the crowd is by having the originality factor. Businesses which feature products that are unique in design and provide specific features that other products in a competing market can’t offer will allow them to create a niche for themselves and provide an extra foothold. Manufacturers can also present their argument for providing originality showing examples of custom machinery that they can provide to produce unique features for a product that make a company and their offerings unique within the market.

  •  Quality

Quality is always a factor when consumers make a purchase regardless of the specific product or market. When working to create a new market for precision and custom manufacturing, highlighting the quality factor they can provide is essential to partnering with new companies within an emerging  market. Pinpoint exactly how the manufacturer can provide a high level of quality that sets their brand apart and makes it an attractive option to consumers.

Utilize Tax Credits For Research Funding

As mentioned previously, one of the keys to creating new markets for custom and precision manufacturers is through research. These companies can actually receive tax credits by using R & D tax incentives. They were enacted in 1981, and were designed to assist companies that are producing new products or even improving on an older variety of product. Harnessing these tax credits will allocate additional funding for research and development to help create and establish new markets for the manufacturing companies. The following are examples of how these tax credits can be utilized for manufacturers to create new markets.

  • Research conducted at institutions such as colleges or other research organizations.
  • Expenses related to employees who play an integral part of the companies research and development.
  • Third parties who are hired to conduct research and research related tasks on behalf of a manufacturer.
  • Tangible supplies that are used to conduct research and development. This tax credit covers property and land improvements related to these processes as well.

In order for a company to qualify for this tax credit, it must fall within the guidelines presented by the IRC section 41, which defines the protocol. Essentially, these guidelines are used to demonstrate how a manufacturer is creating new or improved products. This tax credit can also apply to new software, inventions, or techniques that can be used within the consumer market. In the case of software, there are additional qualifying criteria which must be met to qualify. These tax credits can prove to be especially beneficial for research and development of a CNC Company and American manufacturing companies. These credits can dramatically reduce the cost of staying on top of development of new machinery and equipment necessary for working within new markets.

Companies producing machinery and precision manufacturing equipment must constantly evolve to remain a competitive entity within their market. This entails the use of a combination of research, development, technology, and creative marketing skills. Creating new markets to work within may be one of the toughest challenges these companies face in 2019, but with some insight and a solid strategy to appeal to those key individuals working to establish emerging markets, they can rise to the occasion and provide quality products and machinery these new companies need to provide products consumers want to purchase. For more information, visit the Tag Team Manufacturing website and browse the blog. Tag team is a CNC company and American manufacturing partner dedicated to providing clients with the parts they need for their businesses.

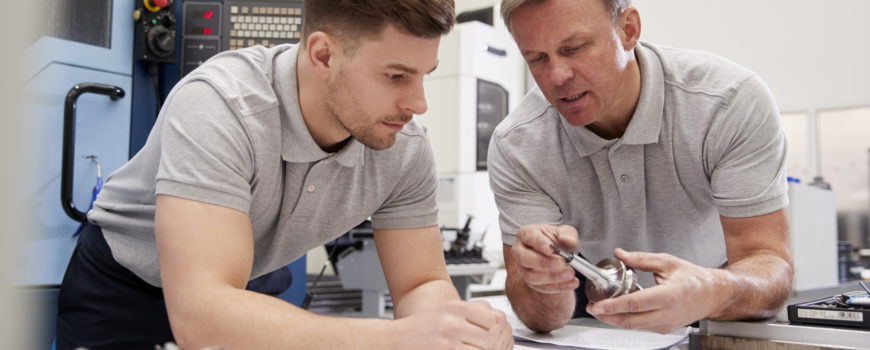
Engineer Showing Apprentice How To Measure CAD Drawings

Why Engineers Choose Tag Team Manufacturing

Experience and longevity have traditionally been hallmarks of successful businesses. The same is true of CNC machine shops. Tag Team Manufacturing has taken the qualities that have allowed us to be in business since 1987 and created the top CNC machine shop in Denver and the surrounding area. Great precision manufacturing shops continually search for the best ways to improve to ensure that we can meet the needs of our customers. Just like the Post Office wouldn’t use outdated technology to deliver mail, Tag Team Manufacturing doesn’t use the equivalent of horse-drawn wagons to manufacture parts and products for our customers.

What You Get

With Tag Team Manufacturing, you get over 30 years of experience and service in our community. We also give our customers over 30 years of continuously improving machines, so we can create the precision parts our customers need. Each year, we determine how we should invest and reinvest to make certain that we meet the needs of our customers as they require ever-more precision.

Our focus in precision manufacturing is to use our expensive equipment and our experienced team to give our customers the support they need to have the final product they want. Whether our customers need something made from aluminum, brass, copper, carbon steel, alloys, stainless steel plastic, our team will create just what you need. Over thirty years-experience also means we have great relationships with our vendors as they will help to ensure your final product is exactly what you want and need.

Our automation not only ensures precision, but it also allows us to use our labor more intelligently to create finished products faster and to maximize our cost efficiency. New technology has also added to our shop safety, made our products even more precise, and allowed us to complete work that would not have been possible in the past.

Sawyer

One of our best new helpers is Sawyer. Sawyer is a robot that takes up the same amount of space as a drill press, but with more accuracy and with less human input and manipulation required. Sawyer is an amazing machine that can lift nearly nine pounds at once, and can be programmed to do literally thousands of tasks with incredible precision to allow his human co-workers to take care of tasks that require thought and variability.

Some of the specific things we ask Sawyer to do include communicating directly with the CNC machine—you might say they talk the same language—Sawyer can also be used for tending products in development, testing procedures, and precision. Sawyer can do everything from a test, to CNC tend, to fabricate and mold, and a dozen things in between. Sawyer is a one-armed marvel who works 24 hours without breaks!

DMG Mori NHX 5000 Machines

The DMG Mori horizontal machines at Tag Team enable high-efficiency, continuous machining and mass production machining. We have two machines, one with 2 pallets and one with 21 pallets. This DMG has a full 4th axis capability and allows us to run multiple operations, using up to 180 tools. The speed, accuracy, and efficiencies of this machine can reduce normal production times up to 75%. With 21 pallets, the “lights out” capability is perfect for the OEM that requires high quality, larger quantities and quick turn around as this machine can run 24 hours. With this new technology, we are able to complete jobs quicker and more efficiently, allowing the customer to receive their parts quicker then expected.

CMM and Smartscope

Tag Team’s CMM, which stands for Coordinate Measuring Machine, allows us to print the dimensional reports which accompany parts when they are delivered to clients. This saves our clients time and money because they know exactly how specific each part has been manufactured. Our Smartscope is able to take a series of photographs and create a product that is within .0005. The Smartscope is used to ensure the precision that our clients need in the production of many small parts, and it makes those evaluations quickly and efficiently. This means you get the parts that you need with the confidence they are accurately fabricated, and we complete them faster than others can deliver them. Most of our customers like that combination of accuracy and speed.

Quality at Tag Team Manufacturing

Our CNC manufacturing shop production works with a Quality Management Program in place to help ensure that the products and the services we provide are top of the line. Quality isn’t something that happens by accident, and it isn’t something that will only be provided for big customers. No matter what project our customers need—big or small—quality is something we do as we make the best products available; and we strive to ensure that our processes and procedures are observed, repeatable, and controlled. These are the things that make us recognized for our quality outcomes.

At Tag Team Manufacturing, we use the E2 manufacturing system which is software that allows us to track historical data which will tell us how efficient machine operators are, machine production, revision changes, and even more information. E2 also allows us to search, reuse, and adapt to other development efforts. This allows us to help customers get products that are made faster, more accurately, and less expensively than if that data was not available.

We also use an automated coordinate measuring machine, or CMM, which lets us determine if a component we have produced is within the accepted tolerance range. We have other automated quality control machines to help us ensure that what we are making for you is exactly what you want and need from us.

Over Thirty Years of Quality Service

Tag Team Manufacturing, rated a top machine shop in Denver, provides the kind of customer service that people expect when they walk into a retail store with high quality parts. We strive to help our entire team understand the importance of staying in communication with customers and potential customers. This communication does not just occur when we need questions answered, but we also want to talk about progress on your project or other questions you may have.

Part of ensuring quality is making certain that files you give us or that we create for your project remain safe. Gone are the days when security meant putting paper plans away when not in use. We use the best software and hardware protections available. We ensure that everything we work on with our machines has real-time backups to protect intellectual property from outside intruders, or from system crashes. Hard copies are protected by security cameras 24 hours a day, and hard copies are stored in fire-proof cabinets.

Tag Team Manufacturing, with top CNC machinists, makes our own product line and we have been named a top CNC shop in Denver. When we work this hard for ourselves, you can count on us working even harder for you. We stand behind our products as we produce the best ball racks in the world.

Consider the pool accessories we build ourselves. Our products have been called the best in the world by professional pool players. The precision that these professionals require keeps us focused on quality and perfection. We strive to be the top original equipment manufacturer in the area.

Find out why Tag Team Manufacturing has been a leader in CNC manufacturing for decades, and why we will continue to chase perfection.

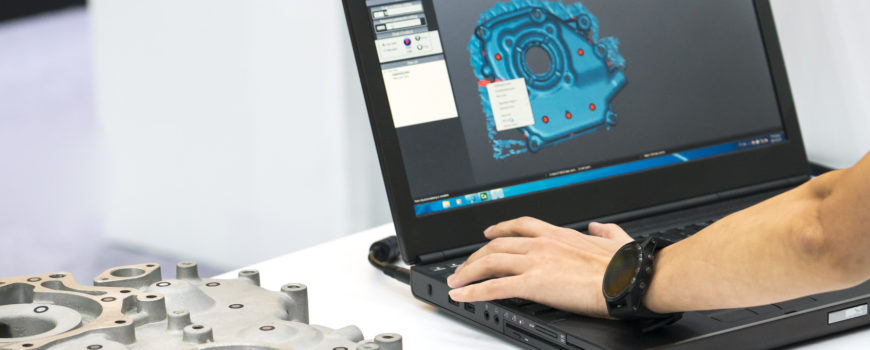
engineer working on computer at the design of mechanical piece

Impact of MasterCam 2019 3D Changes in Manufacturing

CNC Software Inc. The developers of MasterCam recently announced the completion and release of the much-awaited MasterCam 2019. The leading CAM/CAD creator software is now available for purchase by OEM manufacturing companies. It has made several improvements from the job setup to the completion of work. Here are some of the recent improvements and inclusions and the impact of these 3D changes on manufacturing.

Validation

MasterCam 2019 now shows toolpaths denoted in different colors based on the type of move. It makes use of the Dynamic OptiRugh toolpath that enhances the advanced display properties. The Advanced Display has to be toggled on for the display. If not you will still see the cutting and rapid motion shown in different colors. These properties are not available in the wire toolpaths.

In addition, the software comes with improved machine simulation and toolpath. It has analyze enhancements which enables you to analyze the distance, toolpath and block drill support. The analyze distance updates distance as you move the cursor on the screen, and allows you to try different positions without restarting the function. As for the toolpath analyze function, you can control the tool and holder opacity. The MasterCam simulator along with Classic Backplot enables support for different drilling holes at the same time.

Moreover, the previous versions only allow you to create bounding boxes in the current construction plane. However, the new 2109 version allows you to have a different bounding box orientation without changing the construction plane.

These features enhance the programming assurance helping machine operators to make informed decisions before they start a job run. The ability to make changes to different aspects without restarting the process reduces the job setup period thereby speeding up processes. The enhancements also improve the accuracy of the setup thereby improving the quality of the output.

Easy setup and preparation

In addition to the toolpath support, the MasterCam 2019 has improved the efficiency of the job set up with the enhanced CAD model import support capabilities. This enables you to use CAD models created by other programs and processes on your software rather than create new models from scratch. Companies that outsource CAD modeling tasks will find the import feature helpful. In addition, the new software release has a better fixture setup and has expanded the support for model-based definition.

The new features allow for greater collaboration with other CAD software at the premise. It allows for teams to work on different projects in different software and bring the models together on the MasterCam for enhancement and job completion. The features also improve the setup lead time and shorten the time spent from set up to completion of a task.

Tool support

The latest release comes with an expanded digital tool library which offers a variety of tools to the CAD programmers to create more accurate models. The new release has one of the most advanced tool technologies allowing for more precision when working on different models.

In addition, the software comes with Accerelated Finishing TM that enhances the quality of the finished work through an increase in the number of tools that you can work with. The proprietary system includes taper and lens style tools, and oval form and barrel tools. Users are able to work with precision manufacturing on sloped surfaces while enhancing the finish of the surface and reducing cycle time. The new system outperforms the standard ball nose cutter methods in terms of quality of output and precision. Collaborate with a reputable Machine Shop Denver if you have problems configuring the tools to work with any tool in the library.

CNC programming made easy

CNC programming is one of the cost centers in many machining companies. However, the 2019 release of MasterCam lowers these costs while improving productivity through the use of automated 2D toolpaths that work through axis improvements. In addition, the software has improved chamfering which allows for the creation of symmetrical sloping as well as 45 and 90-degree angles with increased precision. When combined with multi-axis deburring capabilities, it results in smooth edges and easy removal of the sharp edges. Ensure that you work with a custom machine shop to ensure that you have the right parts for your machining equipment.

Moreover, the software has re-engineered holemaking by making the work of a CNC machinist simple and fast. It also has several technologies including the Equal Scallop toolpath to improve the surface quality during machining. In a bid to make machining even more versatile, the software supports Sandvik Coromant PrimeTurning™, bar feed, enhanced grooving along with most features of turning and mill-turn tasks. Finally, it also offers support for Lathe technology and Swiss machining technologies.

These technological enhancements have significantly lowered the cost of machining, reduced material wastage, enhanced efficient energy consumption and improved the surface appearance for finished goods. The support for popular technologies allows companies working with different machining technologies to tap into the MasterCam wealth of features for improved production.

Enhancing documentation and task management

Quality certification is at the heart of every OEM manufacturing company. With the certification comes lots of paperwork and rolls of documentation for both the technology and the processes used in the production. The new released makes documentation a lot easier with its various capabilities. These include the new toolpath visualization capabilities and availability of section view tools which enable you to provide accurate diagrams of various processes with ease.

Moreover, the software has made great improvements in the view and set up sheets enabling information for each level in the production process to be accessed with ease for reference and job planning. In addition, there several system level enhancements that are put in place to allow you to manage job flow with increased efficiency. You can also access several process documentation tools for report and quality control initiatives.

Shortened training and adoption periods

When new programming employees join the company, the process of training and orienting them to use the software products in the company may take a long time and high costs. The new release has made learning, use of the software for CAD and production processes a lot easier. It has a variety of features that include enhanced graphics for tool support, analytics, and documentation, rearranged setting systems that enable fast access to a variety of features, and detailed documentation that enable users to access as much information as possible in every stage of production. MasterCam has the most extensive collection training material among CNC manufacturing software making it easy to learn and perfect skills. The faster the new users get on board, the more advantageous it is to the company due to the increased workforce and ability to maintain consistent quality of output.

Buy your machining components from an Original Equipment Manufacturer and Denver Manufacturing reseller to work with your software for good results. A custom machine shop is able to provide quality parts for your specialized manufacturing equipment.

GD&T

GD&T 101: Understanding Fundamentals of GD&T in a Machine Shop

In precision manufacturing, electrical specs are ideal for specifying electrical components appearing on a drawing. Mechanical components require unique spec system that are replicable.

Also, mechanical spec system should be clear, precise and not excessively restrictive. Geometric Dimensioning and Tolerancing (GD&T) is the new phase of precise designs.

What is GD&T?

Geometric dimensioning and tolerancing (GD&T) is the primary international language that aims to offer clarity in most drawing interpretations and specifications. The ideal use of GD&T in CNC manufacturing helps in the elimination of vague drawings. Vague drawings give room for guesswork, controversy, and assumptions in manufacturing and inspection processes.

GD&T is a language of standards and symbols wholly designed and used by top CNC machinist, engineers, and manufacturers worldwide. They use this language to describe products and facilitate communication between entities working together to create products.

Through advanced knowledge on the best practices to create a well-structured GD&T, you can improve communication with your custom machine shop Denver. As a result, everyone in the workplace speaks the same language.

Why is GD&T Important?

GD&T may seem like a complex language. It requires correct interpretation and specification for efficient and effective communication. Improper implementation can cost your company a lot of money. Nonetheless, excellent training offers your employees sufficient comprehension of GD&T and its proper application on a particular job.

Constant measurement and effective communication across engineering processes and disciplines are vital for production of superior products. GD&T helps you achieve this goal. It’s primarily designed to address major challenges facing companies and organizations when describing product geometry.

GD&T symbol language allows for accurate communication of all geometry needs for any related components and assemblies. Designers, engineers, and manufacturers use the ‘language’ to understand detailed engineering drawings in commercial design, automotive, manufacturing, electronics, and aerospace industries.

Moreover, it assists in controlling and specifying forms, location, and orientation of the features. GD& T also characterizes machine shop components and manufactured parts.

GD&T symbols for every dimension on a manufactured part or component are defined in connection to a datum. Datum is a theoretically perfect plane, point, or line on a manufactured component perceived to be the reference point for all dimensional measurements and tolerance calculations.

All datum(s) on every manufactured or designed component is considered as the ‘zero point.’ Calculations get built from the reference point to every other dimension to guarantee consistency of particular parts. Therefore, manufacturing, design, and quality engineers get great manufacturing and measurement clarity. Furthermore, incorporation of a datum dramatically simplifies all specification and design processes.

ISO-certified GD&T languages have successfully replaced complex and long industrial descriptions with simple symbols. The symbols are clearly and unanimously understood by all precision manufacturing personnel required to read and interpret any engineering drawing.

Benefits of GD&T

GD&T offers many benefits to OEM manufacturers. The entire design philosophy implemented in GD&T is similar to that extensively featured in functional dimensioning. Every part gets defined based on how it functions in the end product.

The designer meticulously bases the required tolerance on part function instead of copying it from a previous drawing. This strategy enables the use of maximum tolerance in the production of parts.

When applied appropriately, functional dimensioning, often multiplies the total tolerance on most component dimensions twice or thrice. Dimensioning significantly lessens the overall manufacturing costs.

With the incorporation of accurate coordinate dimensioning, all tolerance zones are not associated or connected to any functional requirements. In case a designer assigns tight tolerances, problems can occur since they are not in any way resolute in the determination of a beneficial and functional tolerance.

So, why use GD& T?

Round tolerance zones

Round tolerance areas permit roughly 57% supplementary tolerance compared to square zones which result in additional functional parts. The manufacturing process gets enhanced in capabilities when more tolerance on the parts. This helps in significant reduction of manufacturing costs.

Bonus Tolerance

Under certain conditions, GD&T creates room for a bonus tolerance in addition to round tolerance. The bonus comes from the use of Maximum Material Condition (MMC) modifier. The MMC modifier increases tolerance in precision manufacturing.

Bonus tolerance is a practical example of a win-win situation for the involved OEM since manufacturing can get further tolerance when holes are bigger than their smallest functional size. On the other hand, clients get a guarantee parts will assemble without a hitch.

Tolerance zone in coordinate tolerancing is always constant with size irrespective of hole conditions. Several functional parts can be scrapped to create a more rigorous condition for CNC manufacturing. Bonus tolerance allows for additional tolerance in production which assists in lowering operational costs.

Reduces Assembly Problems

GD&T inspection process ensures that all parts assemble correctly. Assembly procedures don’t necessarily require a CNC machinist on the assembly line using a hammer and a two-by-four.

Moreover, GD&T inspection process ensures that OEMs can obtain multiple sources or use competitive souring for the same part. The reduction of assembly problems consequently increases your company’s profitability.

Clear Communications for Inspection

GD&T’s datum system enhances clear communications of a single set up feature for inspection. The assessment equipment mainly stimulates datums. The symbol that is universally used in the specification of any datum denotes the part surfaces that meticulously touch the gaging apparatus during inspection.

All datum features get chosen based on part function and assembly requirements. They are in most cases the features that comprehensively mount and precisely locate parts in its specific assembly. The datum(s) reference letters get specified within the statistical and geometric controls. They also symbolize the series in which specific part surfaces majorly contact the gaging equipment.

GD&T supports SPC use

GD&T datum system offers repeatable part dimensions essential for designing a reliable SPC chart. SPC data might comprise of assumptions with implementation of coordinate tolerancing which diminishes the accurateness of data obtained. Profile control use is an ideal example of how GD&T supports SPC.

Profile control helps in the establishment of a mathematically distinct tolerance zone. Moreover, it relates extensively the obtained measurement to datums. Precise tolerance zone description does not exist whenever coordinate tolerancing is used.

Profile control together with datum system enhances the accuracy of the obtained SPC data. Therefore, no unnecessary changes are made in the Original Equipment Manufacturer and Denver Manufacturing processes. It saves time and money for the company.

For original equipment manufacturers to realize the benefits of GD&T, correct utilization is key. When used incorrectly, it can result in costly errors. For example, if a manufacturer uses erroneous drawings to choose machines to use and production rates, it results it incorrect cost estimates. In the long run, manufacturers end up using wrong equipment and producing substandard products. Solution?

Customers want to work with companies who have successfully used this incredible technology. Call or visit Tag Team Manufacturing to speak with our experts.

cnc machining

How does different material impact CNC tooling?

CNC machining offers significant flexibility for the manufacturing industry. However, depending on your manufacturing needs, you need to consider what materials to work with to achieve efficiency and cost-savings. While various machine shops offer guides on material selection, you should be aware of the properties of various materials and their impact on CNC tooling.

With the right approach to material selection, CNC machining translates into an efficient manufacturing process with high-speed production rate and high precision for critical applications in areas such as the aerospace, photonics, environmental monitoring, computer storage, bike, oil and gas, drone, electro-mechanical, and robotics industry.

Understanding the impact of specific materials on CNC tooling improves your productivity since you’ll be able to match the materials with the right tooling style. For instance, wood, plastics, and composite machine are workable with most CNC machining styles, which are equipped with the HSK style tool holders or, ISO/SK/BT style.

However, specialized applications cannot be executed with standard CNC machining styles. Thus, you’ll need specialty tool holders such as the heat shrink and hydro tool holders. While CNC machining has a unique capability for cutting and forming various types of metals and polymer materials, it is impossible to reap maximum benefits from it without proper selection of materials.

Here is what you need to know about the impact of various materials in CNC tooling:

Hard materials

In most cases, machining hard materials, is hard work and demand a combination of high precision and rigid tooling system. Tooling hard materials requires more processing in contrast to normal materials. You need to apply the right strategy and tools at every stage of the manufacturing process. In fact, you have to master it to realize the desired output.

Tool Choices

CNC machinists have the choice of distinct tools; the square end mills, bull nose and ball-end. In some cases, hard materials require you to combine for different stages in the manufacturing process.

For roughing operations, hard materials require the use of the ball end mill. It also the ideal tool for finishing operations. The ball end mill is characterized by a large radius, which helps dissipate heat and force. As a result, it enables you to work at high speeds and to feed the material quickly for you to cut closer to the net shape.

As for large parts with flat floors, you need a bullnose tool. In contrast to the ball end mill, it has a small radius and limited capacity for dissipating heat and force. Thus, it is not ideal for parts that require sharp corners, especially where the floor and the wall meet since it results in chipping.

For such cases, it is best to use a square end mill. Alternatively, you can employ dry machining with air or oil to reduce the chipping since it provides higher spindle speeds.

Tool Geometry

Since hard materials cause rapid wear of tools, a custom machine shop in Denver may demote them to semi-finishing tools or re-sharpen them.

However, since CNC is meant for high-precision manufacturing, the need to cut varying angles and edges using a blunt tool will lead to losses since it has lost its tool geometry.

Tool geometry is critical to precision manufacturing, and a deformed tool should be replaced since it conflicts with the programming specifications for proper operations. CNC manufacturing relies on programming templates for quality control. For instance, CNC programming with a gibs feature is best addressed with a gibs template for the easy selection of tools and tool paths for your manufacturing project.

Such templates are applicable for speeds and feeds on various features and allow you to pick a specific feature and the tool to work with, which comes with predefined speeds and feeds.

The templating process is used for the standardized features of a mold, for example, base plates, gibs, and retainer plates. It is quite helpful when handling hard materials since the process positively impacts time value and tool wear.  With the knowledge of proven patterns and tools when working hard materials is invaluable since it helps you apply templates for fast and efficient cutting process, and, at a cost-effective price.

Since hard materials are dense, they’re full of tension and require soft machining to release the tension. Thus, you must begin by roughing the materials in their annealed state. The soft machining process informs the choice of the type of CNC tooling to apply since you need to optimal material removal.

To make the machining easier, roughing is followed by heat treatment. Since hard materials break into chips when heat-treated, you need inserted cutters to make the chips move fast. Also, they require tool path patterns that can support the fast movement of chips to hasten the process. As an original equipment manufacturer, it is critical to leverage toolpath concepts such as adaptive clearing for the heat treatment process.

With knowledge of how different materials react to heat treatment allows you to select the right tool for the job so you can monitor the twisting of the mold to the required shape.

As such, you need to balance the stock to create enough room to adjust the mold during the finishing process. Also, you should have the right amount of stock to avoid excesses, which would lead to hard machining to remove it.

Since the finishing process comes after the heat-treating process, you need a hard machining plan. Heat-treated materials are harder and create a stronger surface, but brittle, thus challenging to machine.  As a result, you need an assortment of specific tool sizes to achieve the desired stopovers for surface finish.

Part Geometry

In addition, you need to apply specific techniques such as raster passes to make the cutter intersect with the vertical planes made during the roughing process. Denver manufacturing services by Tag Team reference part geometry for the proper configuration of the machining tool to achieve precise surface finishes of high quality.

CNC tooling is flexible, but it is informed by choice of materials you use. While the focus here has been on hard materials, all types of materials have an impact on CNC machining since you have to consider part geometry and the desired designs.

For instance, in the design of complex and detailed parts, a mistake in the choice of CNC tooling could lead to the design of unnecessarily expensive parts in the design phase.

Design

For CNC machining to work properly, the programming of the tools has to map the desired design on the mold. Thus, it is critical to get the right drawings and feed the right tool to produce the right design. However, this should not be a challenge since you can leverage the expertise of Tag Team, a CNC machinist, and precision manufacturing company in Denver. Besides, they specialize in the manufacture of precision components for OEM’s in every industry.

At Tag Team, we have the skills and capacity to work with original equipment manufacturers in developing prototypes. With the capacity to generate over 50,000 components yearly, we can help you with your CNC manufacturing projects.

Manufacturing Sector

Is US Manufacturing Making a Profit?

Many people view the manufacturing industry in the US as one that is untouched by technological changes. This skepticism has led to some questioning whether the manufacturing industry is making a profit in this era.

Addressing concerns on the decline of the manufacturing industry in the US

The manufacturing industry experienced a major hitch during the recession, with more than 5.8 million workers losing their jobs between the years 2000 and 2010. While the 2007-08 recession played a major role, many attributed this to the automation and the introduction of robotics in the manufacturing industry, some thought that this was a sign of the slow growth of the US economy and that the US was losing its grip to support its population.

According to the IMF, the decline does not necessarily indicate a shift in the industry’s size. Instead, sector inequality is what is bringing about this concern. In a recent IMF report, Bertrand Gruss stated that “the decline in manufacturing need not be a source of concern as long as the policy mix is right.”

Though the industry has gone through dark times in the recent past, data from the US Census Bureau shows that it is making profits, with the first quarter of 2018 having a $154 billion, up from the $117.6 billion that had been realized in the last quarter of 2017.

Manufacturing trends behind the industry’s current profits

Labor automation
The use of CNC manufacturing has played a major role in the success of this industry. While this is no magic wand, it has made manufacturing companies more competitive. Automation of processes and the use of digital machines has led to increased productivity as tasks that were done manually at higher costs, and less accuracy are now automated. This has led to a significant drop in manufacturing jobs, but its benefits far outweighs the challenges. Through an efficient production process manufacturers realize an increased output which ultimately leads to increased profits.

Machine outsourcing and leasing
Automation has not come without its fair share of challenges. These human-capacity-saving machinery in most cases have extremely high upfront costs. However, any company can now walk into an Original Equipment Manufacturer and lease any machine. This, coupled with the many financing options has given the industry a major boost. Finance companies are offering to settle not only the machine’s cost but other soft costs such as its installation and freight.

Rising demand
The US remains to be a lucrative market for manufactured items. This has continued to lure both local and international manufacturers to open companies in the US. The streamlining of global logistics has opened up this industry to the world. Technological innovations have made the moving of products and services faster, cheaper, and easier. As such, manufacturers have increased their visibility to potential clients not only in the US but all over the globe. This has seen the demand soar especially in emerging economies. With the increased demand, manufacturers have doubled their output capacity, which explains their profit story over the last few years.

Further, the rise in global demand has led to US manufacturers seeking international allies. In most instances, the US manufacturer works on the design and the products’ functionality while the international partner manages distribution in the country they are in. This has also enabled the manufacturers to widen their global reach and maximize their revenues.

The rise in industry technologies
Manufacturers can now efficiently source for raw materials or deliver their finished products anywhere in the world. They can now have multiple facilities all over the globe, as opposed to the past where facilities were set up depending on the raw materials’ proximity. Through cloud connectivity, such facilities can sync data which is accessed by each facility in real-time.

Evolution in the precision manufacturing sector has made manufacturers maximize their production output, increase the machine’s running times, and reduce downtimes. Through design and simulation tools, manufacturers can validate the products’ design before the final production. This results in the production of perfect products and reduced design time.

Increased diversification to service provision
The integration of automated systems in the production process has necessitated that there be a constant support for optimal efficiency. Case in point is IBM, which actually sells more services than goods. Many Denver manufacturing shops also offer services that are meant to help companies maintain and upgrade their machines. This has led to diversification and eventual realization of profits.

The future of the manufacturing industry in the US

Concerns on whether the US will be able to recoup its position as a leader in the manufacturing industry continue to be a significant bone of contention. The US population is also waiting to see whether the current administration will deliver its promise, that is, ensure that the low and middle-class workers get their manufacturing jobs back. Besides, everyone wonders what impact increased manufacturing automation have on the workforce in the long run.

All indicators show that the manufacturing industry is experiencing a resurgence, and focus is shifting to policies that will accelerate this growth.  Policies such fewer government regulations and investment in infrastructure geared towards enhancing manufacturing are expected.

While manufacturing jobs are returning to the US, it will be necessary for any machine shop Denver, to employ the same skills that were applicable a few years ago. As a result, we will see more efforts from government agencies and corporates to bridge the skills gap. The curriculum also has to be adjusted and relevant programs introduced to ensure more skilled labor is available.

Also, no CNC machinist is going out of business as technological innovations lead to production efficiency and the production of high-quality products. Undeniably, we can only expect more automated processes. This will further be influenced by the evolution of the Internet of Things. We can expect advancement in M2M applications, 3-D printing, and AI equipment. It is hard to find a custom machine shop that is not making use of such technological innovations for products with multiple customization options and fewer flaws.

The manufacturing industry plays a major role in the US economy. Increase in efficiency due to automation will ultimately lead to increased production, time-saving, reduced downtimes due to the use of smart machines will all lead to higher profit amounts and a healthier economy. While these changes are welcome, they will lead to changes in the workforce and better products.

cnc machine in action

Machine Shop 101: Top 7 Secrets To Choose Right

Selecting a CNC Machine Shop can be a daunting task with many options available. Innovative strategies are imperative to guarantee selection of a competent shop providing cutting edge technology. Usually, an Original Equipment Manufacturer has experienced evaluators that determine whether a supplier has the minimum requirements.

The team features Quality, Sourcing, and Machining personnel. Each team member represents particular facets of the business. Some Precision Manufacturing set rigorous requirements when conducting supplier evaluation.

Why choose the best machine shop Denver suppliers? 

Choosing a machine shop supplier determines the success of your company in so many ways. Some of the benefits of choosing the ideal one include:

•    Lower costs
•    Reduced scrap levels
•    Great agility
•    Smoother workflow
•    Improved forecasting
•    Reduced setting times
•    Shortened manufacturing lead times

What is the secret?

1.    Samples of Previous Work

Any shop or manufacturer can claim to make the best equipment for every industry. However, custom machine shops that are proud of their products go a notch higher and allows you to inspect their prototypes. Also, they let customers and business owners see all parts and equipment manufactured in their shop.

When customers see examples of previous work, they get a visual representation of their attention to details and craftsmanship delivered to every piece. They get to verify the quality of the end product even when the supplier is working with huge runs of 2-dimensional parts under pressure of tight deadlines.

The ideal CNC machine shop should offer samples on demand and have a command in discussions about their industries of specialization. A knowledgeable and experienced machine shop gives customers great confidence in the quality of their machines. Previous samples confirm that a supplier has honed their skills working with a plethora of materials commonly used in a particular industry.

Don’t you think high end machine shops should be able to deliver precise cuts needed to fit into customer’s specifications?

2.    Enables Project Flexibility

As you choose a custom machine shop that is conversant with crafting ideal parts for your industry, also focus on how flexible they are with particular jobs. The search for a perfect choice should not make you jump from one shop to another. Sometimes, in-house limitations relating to the types of equipment their CNC machinist can work with on their availability and your project.

The best Denver Manufacturing machine shop has in-house skilled machinists, equipment, and necessary experience to get most projects completed as quickly as possible without undermining quality. Ideal manufacturers should also be flexible in offering different size runs ranging from small prototype machining to big scale productions using assortment of materials.

3.    Incessant Improvement

Leading Custom Machine Shops always pay great attention to continuous improvement. Progressive improvements of materials, parts, and equipment produced increases value offered to customers. Some strategies used to measure improvement process include Lean, Six Sigma, Kaizen, and other techniques. Evidence of such quality improvement measuring processes ought to be readily available to customers with proven results.

4.    Offers Excellent Communication Methods

Communicating specifications for prototypes, materials, and parts in any precision machine shop should always be continuous. Alterations can arise at any time. Whenever communication between machine shops and manufactures goes limbo, doubts kick in. Dissatisfaction extends to potential clients through reviews and recommendations.

A quality machine shop focuses on these four customer communication aspects:

•    Allows customers to use their preferred communication channel that suits their operation.
•    Takes time to explain technical capabilities of various machine parts to clients.
•    Offers a contact person who is readily available to answer questions and implement alterations quickly to minimize material waste and time loss.
•    Asks relevant questions concerning customer’s project and how to enhance their job to get value for money and improve their experience.

5.    Implements Quality Control Measures

Quality is paramount for every customer irrespective of parts or equipment ordered. Therefore, every Precision Manufacturing company should create control measures that eliminate production errors in all steps of a manufacturing process. If a shop lacks documented quality control measures, it’s advisable to seek services elsewhere.

A professional Denver Manufacturing shop will be ready to talk about quality certifications such as IS0 9001 and AS9100 standards. They have extensive documentation about the equipment used to determine specification accuracy, for example, coordinate measuring machines. They elaborate what control standards are set for every part, machine, and equipment whenever rejection rate starts to rise.

The best Custom Machine Shop informs their customers about their failure rates and measures taken to reduce this rate to manageable levels.

6.    Equipment and Technology Advances Investment

A CNC shop is just as good as their machinists, staff and equipment produced. It is advisable to research on the types of software and equipment currently used to make the required prototypes and parts. Moreover, ask the shop management about other materials and equipment available in their shop.

Research on all equipment used in the production run phase, for instance, CNC Machining, Wire EDM, and Manual Machining. That information is essential since some stages in the manufacturing process may require hands-on approach for tooling prototypes. The shop should be well equipped with various software capabilities and can modify model designs upon request.

Additionally, CNC Machinists should be well qualified to handle onsite equipment and software efficiently. Their extensive knowledge of all equipment necessary for the production process and how well they use quality measuring equipment should be certified at proficient levels. Therefore, technicians should never hamper any of your bottom lines.

7.    Interact with Previous Customers

After reviewing an Original Equipment Manufacturer capabilities, communicate with previous customers. It is advisable to check reviews given by previous customers online about the shop. Questions that you may ask previous customers include:

•    What customer service got provided?
•    Did the machine shop meet expectations and how did they enhance customer experiences?
•    How long did the customers work with the machine shop?
•    Were there any defects or problems with deadlines and how did the machine shop resolved these issues?
•    Did the machine shop offer extensive information about their capabilities?
•    How were communication and modification requests handled in cases where changes were necessary?

Speaking to previous customers enables you to learn about all the procedures that the Manufacturing Shop implements to satisfy customers. Why choose blindly when you got so much time and reviews online?

The future of machining is brighter now than ever. There are many things to produce. Pressure is mounted on machine shops to play their part in increasing machine and machinist’s abilities and management to maximize flexibility and speed. Are you looking for such machine shop? Get in touch with Tag Team in Denver.